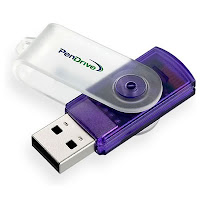
Format your PC using a Memorycard or Flashdrive (Pendrive)


Microsoft Provides a tool to do this for you – Windows 7 USB/DVD Download Tool which is available for download here.  If you need instructions on how to use the tool, see the Microsoft Store Help on the ISO-Tool  (http://store.microsoft.com/Help/ISO-Tool).

It surprised me to find that there are very few dead-simple guides to creating a bootable USB thumb/pen/flash drive for a Vista and/or Windows 7 installation.  I cobbled together the following from VistaPCGuy and another source I don’t remember right now.

This will walk through the steps to create a bootable USB flash drive for the purpose of installing a Vista or Windows 7 OS.  These instructions assume that you have a computer with Windows Vista installed on it.


Required things:-
1=USB Flash Drive (4GB+)
2=Microsoft OS Disk (Vista / Windows 7)
3=A computer running Vista / Windows 7

Step 1: Format the Drive

The steps here are to use the command line to format the disk properly using the diskpart utility. [Be warned: this will erase everything on your drive. Be careful.]
1. Plug in your USB Flash Drive

2. Open a command prompt as administrator (Right click on Start > All Programs > Accessories > Command Prompt and select “Run as administrator”

3. Find the drive number of your USB Drive by typing the following into the Command Prompt window:

diskpart

 list disk

 The number of your USB drive will listed. You’ll need this for the next step.  I’ll assume that the USB flash drive is disk 1.

4. Format the drive by typing the next instructions into the same window. Replace the number “1” with the number of your disk below.
select disk 1
clean
create partition primary
select partition 1
active
format fs=NTFS
assign
exit
When that is done you’ll have a formatted USB flash drive ready to be made bootable.

Step 2: Make the Drive Bootable
Next we’ll use the bootsect utility that comes on the Vista or Windows 7 disk to make the flash drive bootable.  In the same command window that you were using in Step 1:

1. Insert your Windows Vista / 7 DVD into your drive.

2. Change directory to the DVD’s boot directory where bootsect lives:
d:
cd d:\boot

3. Use bootsect to set the USB as a bootable NTFS drive prepared for a Vista/7 image. I’m assuming that your USB flash drive has been labeled disk G:\ by the computer:
bootsect /nt60 g:

4.You can now close the command prompt window, we’re done here.

Step 3: Copy the installation DVD to the USB drive

The easiest way is to use Windows explorer to copy all of the files on your DVD on to the formatted flash drive.  After you’ve copied all of the files the disk you are ready to go.

Step 4: Set your BIOS to boot from USB

This is where you’re on your own since every computer is different. Most BIOS’s allow you to hit a key at boot and select a boot option.

I used these instructions to get my new Dell Mini 9 laptop loaded with Windows 7 (the PDC bits).  HTH.

Comments

Popular posts from this blog

10 Great NotePad Tricks To Scare Your Friends

Most of you must be aware about a tool called notepad. It is a simple text based editor. But today I am going to discuss some cool tricks which you can perform on your computer using notepad. You can also use these tricks to scare your friends. 1.Cycle a message in your friend’s computer. Type : @ECHO off :Begin msg * Hi msg * Are you having fun? msg * I am! msg * Lets have fun together! msg * Because you have been o-w-n-e-d GOTO BEGIN Save it and... as pc.bat and send it to your friends. 2.Make Keyboard Keys Type Continuously: Type : MsgBox “stop me..! if you can” Set wshShell =wscript.CreateObject(“WScript.Shell”) do wscript.sleep 100 wshshell.sendkeys “{bs}” loop Save it as pc.vbs and send it to your friends. 3.Convey your friend a message and shut down his/ her computer. Type : @echo off msg * I don’t like you shutdown -c “Hahahah You are Doomed” -s Save it as pc.bat and send it to your friends. 4.Toggle your friend’s Caps Lock button simultaneously Type : Set wshShell =wscri...

How to use pen drive as RAM

Yes with some modified settings you can use your pen drive as a RAM 1) Connect your pen drive to your PC [pen drive should be at least 1 GB or if you having 4 GB then its better] 2) Allow PC what he is supposed to do,let system to detect pen drive. 3) After your PC finished with its detection work,you have to do some little 4) Right click on the My Computer and select the properties 5) Goto advanced and then performance setting then advanced then 6) Select pen drive and click on custom size " Check the value of space available " 7) Enter the same in the Initial and the Max columns " You just used the memory of the PenDrive as a Virtual Memory " 8) Now restart your pc and enjoy your fast and super system

Changing a users icon on the Welcome screen

Each user that is set up on your computer can associate an image that appears next to his or her name on the Welcome screen. By default, Windows will randomly select an image for you, but this selection can easily be changed. If you do not like the images that Windows has to offer, you can select any other image. The process of changing a user's image is very simple. Just perform the following steps and you will have it changed in no time: 1. Open up the user manager by clicking the Start menu and selecting Run. Then type in nusrmgr.cpland click OK.This is a shortcut to User Accounts that will save you time going to Control Panel and then clicking the User Accounts icon. 2. This will start up the New User Accounts Manager. To change a user's picture, just click the user name. 3. Then, click Change My Picture text and you will see a screen with all of the different images that are built into Windows XP. 4. If you see one you like, just select it by clicking it and then cl...